

As a seasoned real estate agent, I’ve walked through countless homes and witnessed the small details that make a house not only a home but a safe environment for families. One often overlooked aspect of home safety is the maintenance of your dryer vent. It may seem inconsequential, but neglecting this component can lead to devastating consequences, including the risk of fire. Today, let’s dive into why it’s crucial to keep your dryer vent clean and how you can do it effectively.

Why Clean Your Dryer Vent?
Each year, thousands of fires are reported as a result of lint buildup in dryer vents, leading to significant damage and even loss of life. The lint that escapes your dryer’s lint trap can accumulate in the vent duct, reducing air flow, causing excessive heat build-up, and ultimately posing a fire hazard. Regular cleaning of your dryer vent is not just a precaution—it’s a vital measure to protect your home and family.
Recognize the Signs
Before we talk about how to clean your dryer vent, it’s important to recognize when it’s time for a thorough cleaning:
Increased Drying Time: If your clothes are taking longer than usual to dry, it might indicate a clogged vent.
Overheating: If the dryer feels hotter than usual at the end of a cycle, or clothes are extremely hot, the vent might be blocked.
Visible Lint: Check the outside dryer vent while the appliance is running. If little to no lint is exiting the vent, it’s likely clogged.

Step-by-Step Guide to Cleaning Your Dryer Vent
1. Locate Your Dryer Vent: Start by finding where your dryer vent exits your house. This could be on your roof, side of your house, or at the base near the back of the dryer.
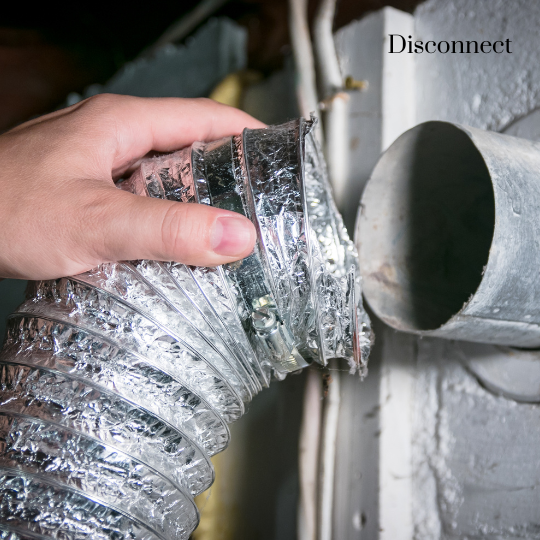
2. Disconnect Your Dryer: Safety first! Unplug your dryer from the electrical outlet. If you have a gas dryer, make sure to also turn off the gas and disconnect the gas line.
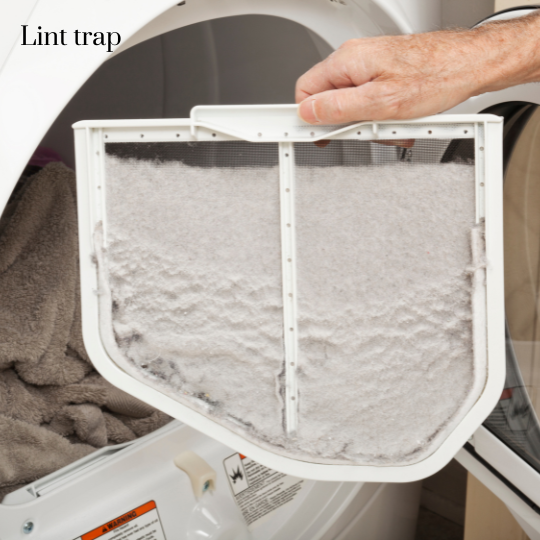
3. Clean the Lint Trap: Before you tackle the vent, remove and clean the lint trap filter. You’d be surprised how much lint accumulates here and can be easily cleaned with a vacuum or brush.
4. Use a Vent Cleaning Kit: These kits come with a long brush and flexible rods that attach to a power drill. Insert the brush into the vent duct and extend it as far as it will go. Use your drill to slowly spin the brush and carefully pull out to remove the lint buildup.

5. Vacuum the Debris: After brushing, use a vacuum to clean out any dislodged lint from the vent duct and areas around the dryer.

6. Reconnect Everything: Once everything is clean, reconnect your dryer. Make sure everything is securely attached, especially the gas line if you have a gas dryer.
7. Test Your Dryer: Run your dryer on a short cycle with a few wet towels to ensure everything is working properly and that the vent is clear.
Preventive Tips
To minimize lint buildup, always clean the lint trap after each load. Additionally, consider a yearly inspection and cleaning of your dryer vent to ensure it remains lint-free. This not only improves the efficiency of your dryer but also extends its lifespan.
In Conclusion
As a real estate professional, my goal is to ensure that every aspect of your home is not only appealing but safe. Cleaning your dryer vent is a simple yet effective way to prevent potentially dangerous fires. Take action today, ensure your vent is clear, and enjoy the peace of mind that comes with knowing your home is safeguarded against preventable disasters.
Know that you can also hire a professional to do this. I have a very good contact in the South west area of Houston.
By maintaining your home’s dryer vent, you not only ensure its safety but also enhance its appeal should you ever decide to sell. Remember, a well-maintained home is a marketable home. Stay safe, and keep your home in top condition!